Hey folks!
As I have told you all before, I am an avid thrifter and "dumpster diver". For me, the older and more shabby something looks, the more I am drawn to it. I love to pick up those things that the vendor is basically trying to get rid of, especially old tables. My company thrives in taking vintage and antique home furnishings and redesigning them into new and improved pieces, and the tables are absolute hits! People rave about them, but many times they have no idea what they looked like before we got our hands on them. In some cases, the entire table needs a little laying on of hands, but more often than not, it's simply a cause for some table top rehab. A scratch, a water stain, or maybe the kids got to it with a crayon, either way, just because the tops a little scarred doesn't mean that the whole thing is ruined. So if the bottom is great, try just revamping the top!
Here are 5 of my favorite DIY techniques that you can try to makeover those damaged, ugly table tops.
1.) Chevron

With a roll of painter's tape, a can of color infused solid stain, and a foam brush, you can create a trendy chevron table top and completely modernize what was once old and dull! Touch up the legs if you need to, then find you a great paint color that will look great on top of your table, and have your paint color made into a solid color stain. I will let you in on my biggest "design secret":
I do not use regular paint on any of my wood furnishings. I use stains infused with color. The coverage is not only better, but it allows for the color to look more natural on the wood. Home depot does it best!
Tape your table in the chevron pattern and make your chevrons as wide or as narrow as you wish. Then, with your foam brush, paint on the non-taped areas, let it dry for half an hour or so, then paint over it once more. Once your second coat has dried, remove the tape and VOILA! You can then touch up as needed and then seal your creation with a polyurethane or shellac finish and you're done!
Here are a few outstanding examples from pinterest that will inspire you to try it!
(Photo courtesy of http://www.latdah.blogspot.com/2012/04/chevron-coffee-table.html?m=1)
(Photo courtesy of http://www.vivaciouslyvintage.com/2012/04/teal-white-chevron-coffee-table-take-2.html)
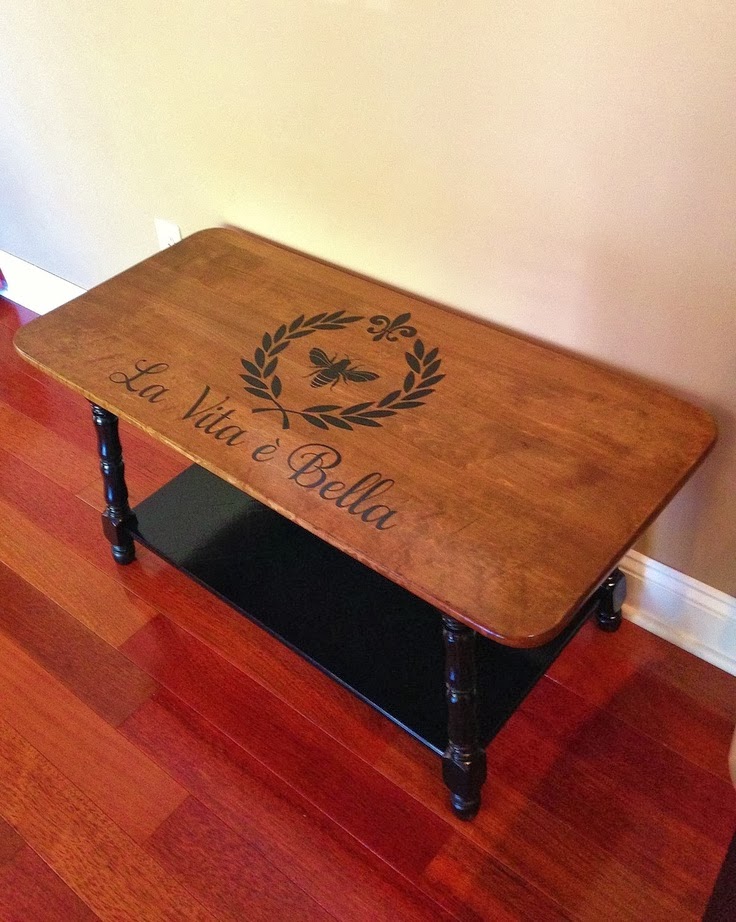
2.) Script Stencils
This is an easy and a fun one. Most craft stores carry the large, savvy little wall quotes or stencils that allow you to paint quotes and images on walls without having to do it all freehand. Pick up one of those stencils and using your favorite color paint stain, paint it on your old table top and make it new! This is not only a quick and easy project, but it is also very unique and personal, as you can put as many words that you want, your personal favorite words, or even designs or images of your choice.
Here is a personal design sample, and one that I have deemed an all time favorite.
And another
Here is a beautiful, but sold out, design from an etsy artist
(Photo courtesy of Pinterest - http://www.pinterest.com/pin/342414377890155271/)
Ok ok, one more from one of my favorites, Funky Junk Interiors
(Photo courtesy of Funky Junk Interiors - http://www.funkyjunkinteriors.net/?b2w=http://funkyjunkinteriors.blogspot.com/2010/10/how-to-make-table-top-sign-with-story.html)
3.) Chalkboard Paint
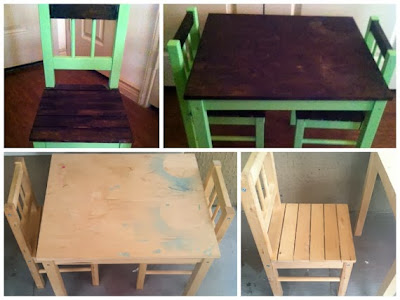
Sand that bad boy down and cover it with two coats of chalkboard paint! The chalkboard paint is not just a hit for the kiddos, but has become quite a staple for those of all ages. Who doesn't like the freedom to express themselves a little bit? It can add a very vintage and classic flare to your furnishing and to your room. When I see the chalkboard paint on table tops among shabby chic decor, I automatically resort to classic diner menus or the scene from The Color Purple where the older sister is teaching her baby sister how to read and is writing words all over the house. And of course, it can just make you feel like a kid again!
(Photo courtesy of Ahava Designs TX- This was a design of mine)
Here is a wonderful example from Pinterest
(Photo courtesy of Pinterest- http://www.pinterest.com/pin/42643527694817023/ )
4.) Scrapbook Pages or Wall Paper

After sanding your table top down to an even surface, adhere wall paper or high quality scrapbook paper to your table top. When I first was introduced to this concept, I thought, "How cheap will that look!" Well, I ate my words once I was finished. The table turned out beautiful and my friends and family fell in love with it. With the wall paper, adhere it to the table top following the exact instructions that you would when adhering it to the wall. For the scrapbook pages, use a good glue adhesive spray to secure the pages down. Let them dry good, and then seal them down with classic Modge Podge. Once the first coat has dried, coat it a second time. I then wait 8-10 hours, and after that, I go in and seal the table top with polyurethane. I recommend using water based polyurethane for this particular project, as I have found from projects in the past, when it comes to papers- scrapbook or wall, the oil soaks into the paper and overall the project just does not come out very good at all. You do not need to apply tons of polyurethane, just enough to seal it securely.
This is an Ahava Design of my own.
Here is a great wallpaper table from apartment therapy.com
(Photo courtesy of http://www.apartmenttherapy.com/look-wallpapered-table-50059)
5.) Securing an Old Serving Tray to the Top
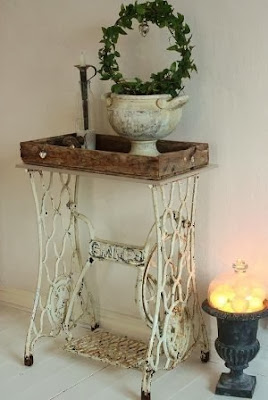
Go to your local resale shop or garage sale and locate one of the old fashioned, antique serving trays, that is about the same size as the top of your table. It is ok for the tray to be slightly bigger than the table top, but definitely not much smaller than it. Then, depending on the material of the tray, either discretely attach the tray in each of the four corners with small nails to the top of the table. If the tray cannot be nailed to the table top or is made of a delicate material, use a super adhesive such as E-6000 or a great, heavy duty substitute, and adhere the tray to the table top. E-6000 is one that I absolutely live by and I have never had any project fall apart with it. But, make sure that you definitely use it in a very well ventilated area (AKA outdoors) and that you use gloves for sure. If you opted to nail your tray to your table, make sure that you either paint over the nails with the color matching the tray, or modge podge something on the surface of your tray that would make the nail heads less noticeable or more discreet.
(Photo courtesy of Pinterest - http://www.pinterest.com/pin/124974958383551993/ )
Here are a few other fun examples:
(Photo courtesy of Pinterest- http://www.pinterest.com/pin/290622982175424332/)
(Photo courtesy of http://kabamfamily.blogspot.com/2013/05/have-you-had-enough-of-french-post-mark.html)
There is no such thing as a few scratches or water spots ruining a perfectly good table in my book! If the legs are still nice, let your creative juices flow and fix the top! You never know, you just might create a new masterpiece before you know it!
Until next time,
Follow us:
www.facebook.com/ahavadesignstx
www.twitter.com/ahavadesignstx
Shop us:
www.etsy.com/shop/ahavadesignstx
Inquire or let us transform your trash into treasures:
ahavadesignstx@yahoo.com


 I coffee stained a few old music pages, cut them to fit around my can, glued them on with craft glue, and then secured them with modge podge. After the Modge Podge dried, I adhered a flat burlap ribbon around the top to add a little detail, and then finished it off with two pastel accent flowers in lime and teal. Original and super cute…I will take that!

.png)