Saturday, August 31, 2013

Transforming Old Stools into New, Savvy Ones: DIY Chevron Stools

Hey Hey!

A few weeks ago a friend of mine listed some random things that she was getting rid of and I managed to snag two of these little lovelies from her. From first glance, they were a little worn, but I just knew I could touch them up a bit! Seeing the potential of an item is key. Never write a piece off as trash; evaluate it and at least attempt something. The legs were in fantastic condition, the wood was nice, and they were incredibly sturdy. I have a great bar area and I was looking for some cute stools to spice it up, but that wouldn't be so plain or bland.

So.....I got these and well lets just say....I transformed them with $20 and one hour of my time.

Let me show you how I took these from shabby to chic. Here we go!


Step 1:
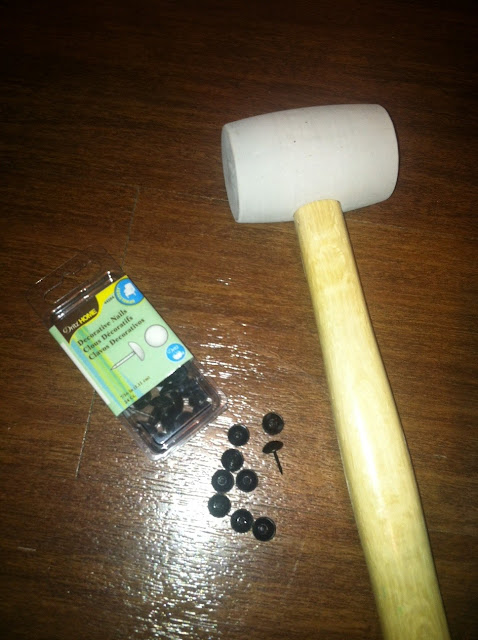
I am a fabric-a-holic, in particular, I really enjoy using duck cloth canvas. It is very durable and always has such a classic touch to any design. I went to my local craft/fabric shop and purchased 1 yard of duck cloth canvas in a cute chevron print, a rubber mallet, and 3 packages of decorative nails.


Step 2:
Lay the stool down flat on the seat on top of the back side of the fabric, and with light colored chalk or a colored pencil, gently and carefully trace around the seat. Then, after you have traced all the way around the seat cushion, move the stool and then with your ruler, measure 3-4 inches out from the line you have just drawn and faintly sketch a line again all the way around. This allows for plenty of fabric for you to nip/tuck and pull to fully cover the seat. Normally with upholstering, I remove the original padding and fabric. But, because this fabric cover was so neutral, I thought, what the heck! I am going to make this easier on myself and upholster over it. It is up to you though. Then, cut out your fabric.

Step 3:
Secure your fabric to the stool cushion by pinning the fabric all the way around the cushion.


Step 4:
After successfully pinning the fabric, using your rubber mallet, carefully begin to nail in the decorative nails about 1 inch apart along the bottom of the fabric as seen below. Do this until you have nailed completely around the cushion and remove the pins as you go. When you reach the corners, don't be alarmed! Tuck and fold the corners and then hammer them down flat (as seen below). Again, hammer GENTLY, as the decorative nails are not as strong as normal nails and you also do not want to scratch them.


Step 5:
Touch up the legs of the stool if you need to with a simple wood stain pen or wood stain and a small brush. I use one brand only- Miniwax! Lots of amazing colors and excellent quality! You can find this at your local hardware store such as Home Depot or Lowes in the paint section.


And VOILA! New stools in 5 steps, just like that!


Until next time,
XOXO

Check us out on etsy! www.etsy.com/shop/ahavadesignstx
Like us on Facebook @ www.facebook.com/ahavadesignstx
Follow us on Twitter @ahavadesignstx

Welcome to the New Design it Yourself Page from Ahava!


Greetings Folks!

It's Carisha here greeting you and welcoming you to the new Ahava Designs DIY page. As you know, I live and love DIY- designing it myself! For those savvy design folks, typically DIY means do it yourself, but at Ahava, I decided to give it a new twist. How often do we think of that something that we need to add to that room or to spice up that space around the house and we immediately hop online to price it and either order it offline or make our way up the road and buy it? In some cases, sure. But, always buying it is so boring and so cliche! Have you ever thought that maybe you could create or design that piece that you want to go out and buy? I know not all of us feel like we have that creative bug in our DNA, but as an artist and a designer, I beg to differ. I believe that at some capacity everyone has an art niche and at least one creative bone in their body if they are willing to try to find it. My heart is to inspire my followers and friends to just give it a try. Art and design are about uniqueness. Perfection goes out the window when it comes to art because the imperfections are what make art, art, and what makes those designs priceless masterpieces!

Several months ago I got the privilege of sitting down with a world renown photography hero and inspiration of mine for about 20 minutes and glean from her wisdom as an artist and as a business woman. It was an honor and while I took notes on many things that she said, there was a piece of wisdom that especially struck a chord in my heart strings and one that I knew I had to put into practice immediately. That word of wisdom was this:

"Always, always inspire and teach others along your journey as an up and coming designer and in building a company. It is your duty, it is the greater blessing."

And the launch of this blog project is going to be my way to hopefully do just that! This blog is designed to inspire and help you, dear readers, to find that creative talent that lies within you, to save money, and to create some of the most unique and one of a kind furnishings and designs for your home without hopping on amazon and ordering the same armoire that 3,900 other people in the metroplex have ordered too ha!

I want to bring to you quick and easy redesign and creative projects that can be fit into the busy schedule of work, soccer games, carpool, church, etc. 5 steps or less is what I am shooting for, but I cannot make any promises (hehe :-D). So, subscribe and follow! Tell your friends! It's going to be epic!!

And to find out more about myself and Ahava Designs, check out the shop page online at:
www.etsy.com/shop/ahavadesignstx
(Our official website is in the works and coming soon!! www.ahavadesignstx.com)

XOXO
Carisha